INSTALLATION OF ELECTRICITY, WATER AND TOILET


INSTALLATION OF ELECTRICITY, WATER AND TOILET
1. Necessary requirements for the installation of electricity and water in the bathroom
The surface for installing electrical and water equipment in the bathroom must be flat, not concave or convex, not inclined to facilitate good drainage.
The floor of the bathroom must have a strong drainage hole and a certain slope to avoid stagnant water causing slippery, dampness.
The bathroom must be located near the sewer, near the water supply system and the power supply system.
During the construction, repair, and installation of electricity and water, do not nail or drill into the wall or floor to avoid electrical short circuits and electrical leakage.
The bathroom and toilet are often wet, so when installing electrical equipment, you need to pay attention to ensure high safety. You should choose the type of electrical outlet with a lid to prevent water. Do not install it so that the electrical wires are exposed.
2. Instructions for installing electricity and water in the bathroom most accurately and scientifically
2.1 Electrical system:
Should be hidden in the wall, the wires need to be carefully protected in conduit. Because the environment in the bathroom is often humid, underground wiring will avoid electric shock due to collision or water on the line. Use wires and conduit to ensure standards of durability and insulation.
Sockets:
Sockets should not be installed in the bathroom. However, if you still want to use sockets for shavers and hair dryers, you should choose sockets that are waterproof and have protective covers. You should install them in a high, dry place, away from bathtubs and showers.
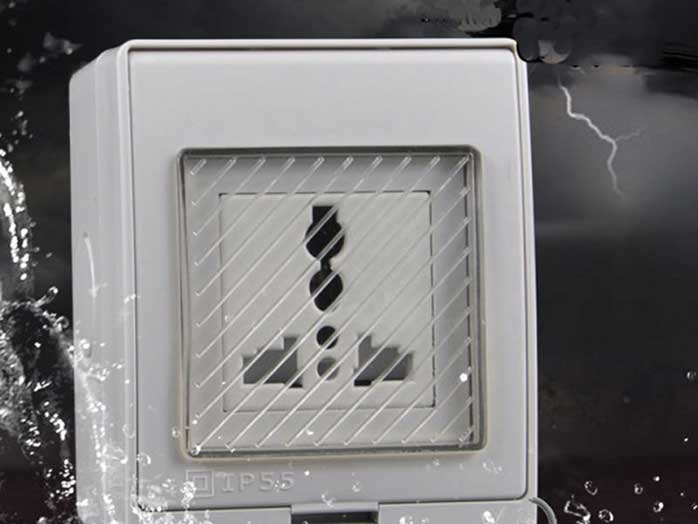
Ổ điện chống thấm nước phù hợp cho không gian nhà tắm
Bathroom lights:
You should choose ceiling lights with protective covers instead of hanging lights. You should design the switch for the light outside the bathroom door. For heating lamps, you should hang them high up to reduce contact with water. Make sure the lamp is about 50 cm out of reach, and do not place the heating lamp near flammable objects such as toilet paper, towels, bath towels, etc.
How to install water heater:
Step 1: Hang the vase
Note that hanging the tank is a very important step.
- Based on the distance between the 2 hanging holes or the available hanging bracket of each type of tank, mark and drill 2 holes on the wall with a 12mm or 14mm drill bit so that it is balanced
- Screw the expansion screw into the drilled hole, tighten the screw, hang the hook, so that the hook curves upwards.
- Lift the tank up, pull it down vertically and hang it firmly on the hook on the wall.
- After the tank is installed, you need to test it by swinging it to test the weight 3 times heavier than the tank when there is water.
Note: If the hole for the tank hanger is too wide, absolutely do not insert any other material but drill another hole because only then can the tank be securely hung on the wall for many years, ensuring safety for people and other equipment located below the tank.
Step 2: Install water line
- Connect the safety valve to the cold water line of the tank (the pipe is marked with a blue plastic dome). Do not tighten the safety valve too much to avoid breaking and jamming the internal parts of the valve (only connect 3-4 threads after wrapping the tape).
- Connect the water supply line for the tank to the bottom of the safety valve with a flexible pipe to facilitate monthly maintenance of the safety valve.
- Connect the hot water line to the outlet pipe of the water heater (with a red border) with a hard metal pipe to be able to withstand the long-term temperature of the hot water flowing out of the tank when we use it every day.
- Connect a pipe to the drain hole of the safety valve so that when needed, we can drain the water from the tank.
The safety valve is set to 8 bar, so it is normal for a few drops of water to flow out of the valve's secondary outlet during the heating process. In case the water supply pressure to the tank is close to the valve value, it is necessary to install an additional pressure reducing valve as far away from the tank as possible.
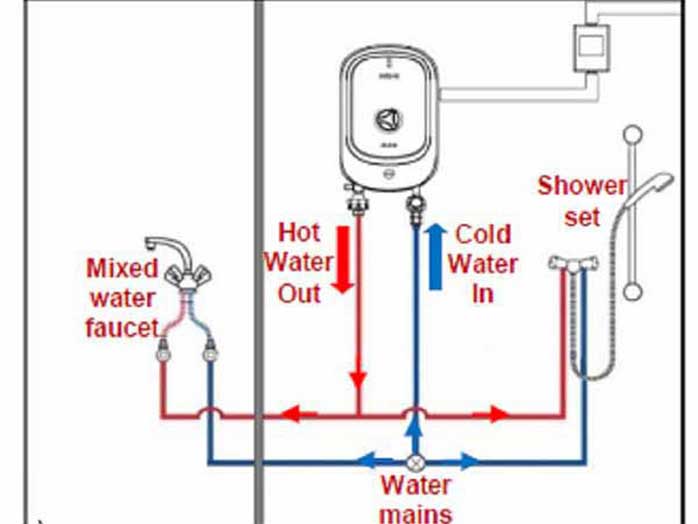
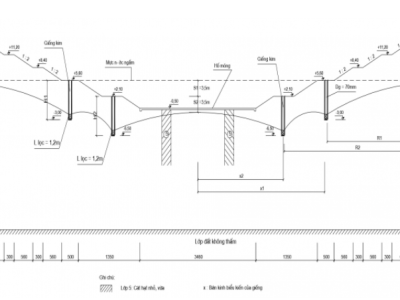
Sơ đồ hướng dẫn lắp đặt bình nóng lạnh
Step 3: Install the power supply.
-
The kettle uses a 220V ~ 50 Hz power source, equipped with an ELCB anti-leakage device. - The installation line must be suitable for the maximum capacity of the kettle (2500 W) - The kettle must be grounded with a ground wire and fixed to the ground wire of the 3-pin plug. - Connect the kettle directly to the power source, a suitable Atomat should be installed outside.
Step 4: Testing and Operation
Before plugging in, open the hot water tap at the outlet, water will automatically flow into the tank. After a few minutes, the water flows out continuously and evenly, the tank is full. Close the tap again.
- Check to make sure the joints are not leaking.
- When the tank is operating, the water valve to the tank must always be open.
- Turn the min - max knob clockwise to increase the temperature. To decrease the temperature, turn counterclockwise.
Instructions for installing electricity and water in the bathroom - self-installing the wash basin:
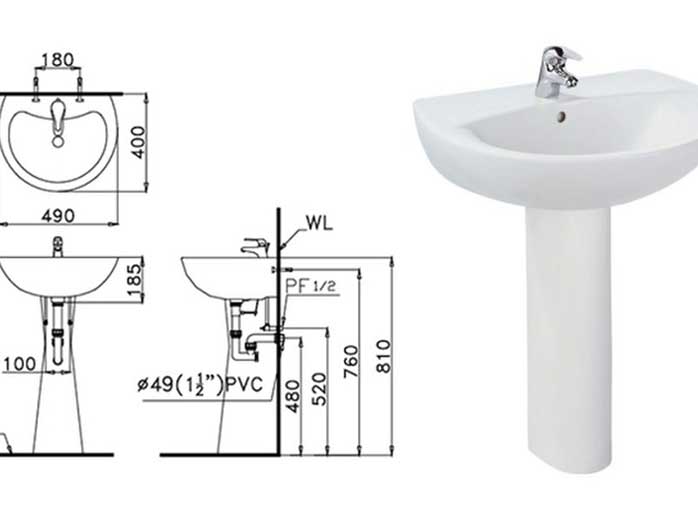
Bản vẽ hướng dẫn lắp đặt chậu rửa
Step 1: Normally, the sink has two hooks on both sides, remember to mark their positions so that they are balanced, use the right size expansion screws to attach them to the wall and then place the sink. If it is a sink with a stone table, we must install the stone table first. For small and narrow tube houses, we should choose a more suitable sink model and learn how to arrange the bathroom in the house to create a spacious space.
Các bước lắp đặt chậu rửa mặt nhà vệ sinh đúng kỹ thuật
Step 2: After hanging the tub, check the flatness with a level. If it is not really flat, you can use thin rubber pads to support it.
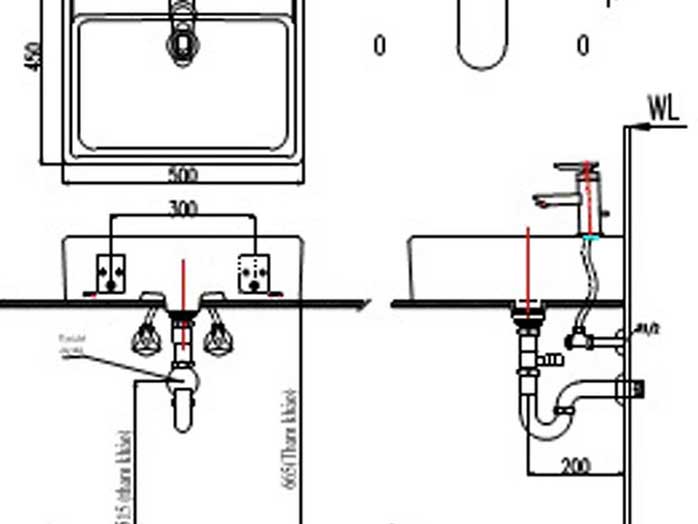
Step 3: Attach the water supply taps, siphons and drain pipes to the correct positions. Check the tightness of the joints.
Step 4: Use silicone glue to fill the gaps between the tub and the wall or between the tub and the stone table. If the faucet is attached to the tub, use a wrench to tighten it tightly to the tub surface.
Step 5: Install the tub legs. These legs are both decorative and cover the accessories inside; and also hold the tub tighter. The new tub has been installed; you can put it into use immediately, but this step is not required for table-top tubs.
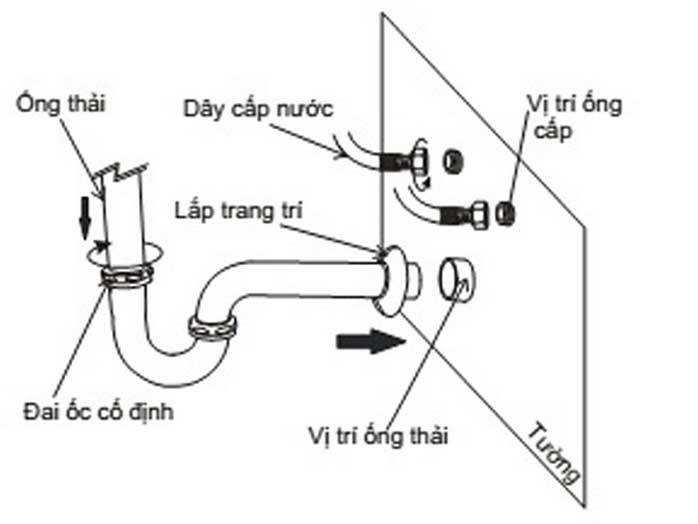
Sơ đồ lắp đặt bồn rửa mặt trong nhà vệ sinh với các bộ phận chính
Shower installation:
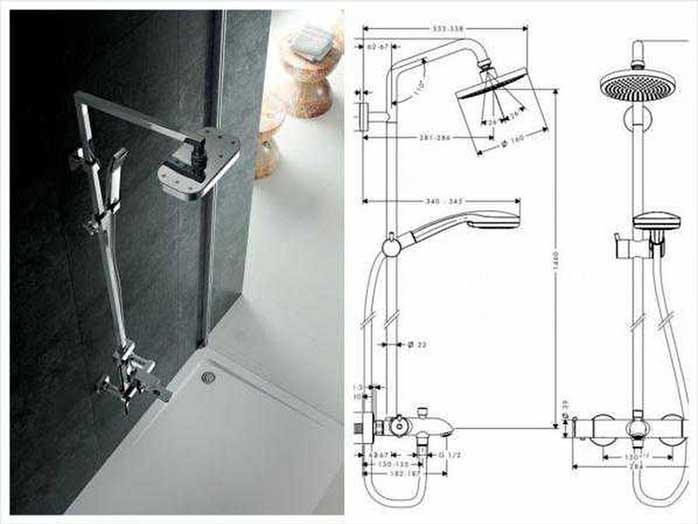
Cách lắp đặt vòi hoa sen trong nhà vệ sinh
Prepare tools
- New showerhead.
- Hand drill.
- Wrench or wrench.
- Ice melt.
Implementation process:
Step 1: Clean the water supply pipe by opening the main valve and branch valves to let the water flow freely for 4-5 minutes.
Step 2: Use ice to wrap the shower head (2 eccentric pipes); then install it into the 2 water supply pipes waiting on the wall. Tighten and adjust the distance between the 2 pipes to 150mm.
Step 3: Install the rubber gasket into the 2 nuts on the shower body.
Step 4: Install the shower body into the 2 shower legs prepared above.
Step 5: Drill and screw the shower arm bracket tightly to the wall in a position suitable for the family's height of use.
Step 6: Finally, install the 2 ends of the shower hose with the shower arm and shower body. Let the system operate and check again for errors.
Conditions required for proper installation and operation:
- Hot and cold water supply pressure must be > 0.05MPa
- Hot water temperature must be < 80ºC
3. Introducing a reputable design & construction consulting service provider
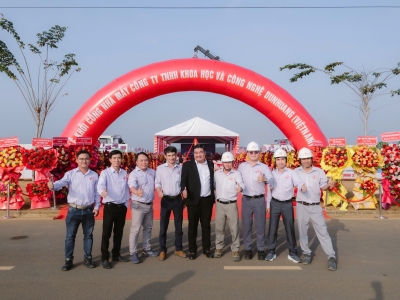
The importance of construction units is undeniable, their reputation will ensure the quality and aesthetics of your project. Currently, there are many units providing construction design services to meet the increasing construction needs in our country. Therefore, finding a reputable unit is not easy and requires you to spend time researching. In the selection process, you need to research carefully and ensure that the accompanying unit must have high expertise, many years of experience, have a clearly signed contract, transparent costs, ... To help customers save time searching, Hung Nghiep Phu Construction Investment Company Limited is confident that it will be the best choice for you.

Hung Nghiep Phu Construction Investment Co., Ltd. with the mission of providing the best solutions and services, building a prosperous community with customers, Hung Nghiep Phu is gradually affirming its brand through sincere cooperation, with a leadership team with ethical capacity, creativity, high expertise and strategic vision. Hung Nghiep Phu owns a team of skilled, highly qualified employees who will bring customers the best quality technology.
Hung Nghiep Phu Construction Investment Co., Ltd. - specializes in constructing civil and industrial works. We look forward to accompanying customers in construction projects as well as continuous procedures such as planning diagrams, applying for construction permits, completing procedures, applying for fire prevention and fighting certificates, ... If you have any questions or are in need of design, completing procedures, please contact us immediately for free consultation!
>>> See more:
_____________________
CONTACT INFO:
![]() Facebook: Công ty TNHH Đầu tư Xây dựng Hưng Nghiệp Phú (興業富)
Facebook: Công ty TNHH Đầu tư Xây dựng Hưng Nghiệp Phú (興業富)
![]() Hotline: 1800.3368 (Miễn phí)
Hotline: 1800.3368 (Miễn phí)
![]() Website: xaydunghunnghiepphu.com
Website: xaydunghunnghiepphu.com
![]() Gmail: kinhdoanh01@xaydunghungnghiepphu.com
Gmail: kinhdoanh01@xaydunghungnghiepphu.com
![]() Address: No. 2034D, Group 22, Phuoc Thai Quarter, Thai Hoa Ward, Tan Uyen City, Binh Duong Province
Address: No. 2034D, Group 22, Phuoc Thai Quarter, Thai Hoa Ward, Tan Uyen City, Binh Duong Province
------
Source: Compiled from the Internet


Partner