

FLOOR TILE CONSTRUCTION TECHNIQUES
Tiling the floor is one of the basic finishing steps in home design and construction. A reasonable and beautiful floor also brings a luxurious space, bringing a more perfect beauty.
1. Prepare materials for the floor tiling process
Prepare the right type of floor tiles, in accordance with the design drawings (if any). This is one of the extremely important steps and you need to be very careful to choose the type of floor tiles as desired. You should clearly determine the location and purpose of the floor area to choose the right type of tiles. Because of course, the floor and the bathroom floor will have different requirements for tile types, so you cannot choose arbitrarily.
Some types of tiles for different locations that you need to pay attention to at this time include: Floor tiles, decorative wall tiles, ceramic tiles (used close to the wall at the contact point between the floor and the wall), border tiles (used in combination with floor tiles to create beauty), corner tiles, hydraulically cut tiles, etc.
When choosing floor tiles, you can choose glossy and matte tiles. Glossy tiles have the advantage of being luxurious, bright, and are suitable for use in ordinary civil works. Matte ceramic tiles are suitable for modern architecture, with high surface hardness, so they are suitable for use in public works (including halls and offices).
After choosing and purchasing the type of floor tiles you want, you need to be careful; and careful during transportation and storage. Floor tiles need to be stored in a dry, clean place; flat, tiles stacked no more than 2m to avoid falling or breaking.
Choose floor tiles of the same color; size to ensure uniformity of the entire floor.
Should or should not wet the tiles before laying the floor: This point of view can be explained as follows:
Normally, for floor tiles, they are often soaked in water before laying. This has the effect of increasing the adhesion between the mortar layer.
Clean floor tiles and paving stones thoroughly before construction. Do not let construction mortar and sand stick to the tiles; Do not mix impurities or lime mortar before construction.
Prepare floor tiling tools including; floor tiles, cement boards, drills, measuring tape, construction tape, tio water pipes, tile adhesive; liquid mortar, chalk, hammer, chisel, mortar mixing board, notched trowel, rubber trowel, rubber hammer; bucket, tile cutter, sponge, brush, gloves, glasses, grout.
Flat floor level: The floor does not sink or collapse; can be sturdy and easy to walk on during construction.
The floor is poured concrete or covered with broken bricks 3 - 5cm lower than the 0-0 level, which is best so that the floor will not be higher later; affecting many other items such as doors or the feng shui chosen by the homeowner.
Position the floor according to the 0-0 level as flat and level or sloping. For example, in the floors of bedrooms, living rooms, kitchens, etc., the floor is flat and level. For bathroom floors that require a slope for drainage, it is necessary to position the floor flat and sloping.
Mix cement and black sand mortar according to mortar grade standards so that the floor surface is flat; no concave or convex to facilitate the construction process.
2. Steps to tile the floor
Step 1: Create the base layer
- The floor needs to be compacted to create a flat foundation; there will be no flooding. The floor also needs to be flat and sturdy to withstand the pressure of walking on the tile surface.
- Stretch the reinforcement wire and create a slope with a tio water pipe.
- Mix the cement mortar layer so that the water gradually seeps in, the dry mortar is mixed moderately, not too wet.
- Spread the mixed base layer evenly, note that do not pour it on the reference points.
- Use a ruler to level it to create a slope according to the reference points; the mortar layer is 2-3cm thick.
Thus, you have completed the step of creating a base for tiling. This will be the premise to decide whether your floor is flat or not. This work needs to be carefully and accurately prepared.
Step 2: Determine the starting point for tiling and tiling
Based on the characteristics of the floor tiles, the area of the house; and at the same time, based on the design to determine the starting point for laying. Normally, if you have hired a house designer, this has been clearly noted in the detailed design documents; including the direction of the tiles, the size of the tiles needed to ensure that the construction team can easily follow the design. This also helps to lay the floor straight and the patterns on the tiles are attached to each other. The detailed steps are as follows:
- First, use a rope to stretch to create a straight line; then lay the tiles according to the principle from left to right, from inside to outside.
- Before laying, spread a layer of cement to increase the adhesion of the tiles and the base layer.
- The tiles are placed in the same direction as the underside ribs on the base layer of mortar. Depending on the size of the floor tiles, the width of the mortar joints will be determined accordingly.
- Adjust the tile and use a rubber hammer to lightly tap the center of the tile to create a stronger bond between the tile and the mortar base.
Step 3: Grouting
Usually after about 3 hours, the grouting will be done because at this time there is a strong bond between the brick and the mortar layer.
- To grout, mix the cement mortar in a 1:1 ratio including 1 part fine sand with 1 part cement; add water slowly and mix well to create the right mortar consistency. You will be able to change the color of the mortar joints by using white cement and colored powder, charcoal water. The tile floor will achieve the highest aesthetic effect with bricks cut to order, different colors and laid interlaced.
- Use a sufficient amount of mortar in the position of the joints that need to be filled by using a pointed trowel.
- Skim off the excess mortar so that the mortar does not fall off and stick to the surface of the brick. The mortar joints can be smoothed or rounded. Currently, there are many modern construction materials that can replace mortar materials in this case; you can use various types of grout to fill the construction.
Performing the correct procedure in this step will give the mortar a glossy finish as well as enhance the aesthetic beauty of the entire floor.
Step 4: Clean the floor surface after tiling
The process of tiling the floor needs to be carried out continuously and properly. Especially when the tiling is finished, it is necessary to clean the surface of the tiles after tiling to ensure the beauty and cleanliness of the project. At the same time, it is possible to promptly clean the mortar that falls on the surface of the tiles to avoid adhesion. You need to clean the remaining mortar on the edges and clean the mortar joints to ensure the aesthetics and glossiness of the floor tiles. The process of cleaning the floor surface after tiling needs to be carried out in the following steps:
- Use clean water to rinse the floor and wipe off the mortar stains on the surface of the tiles; and on the surface of the grout lines with a soft cloth.
- You should let the water soak for a period of time to reduce the ability of the mortar to adhere; then push the water to pull the mortar out during the cleaning process after tiling.
Some notes when cleaning the floor surface after tiling that you need to pay attention to:
- Do not clean the floor too early or too late because if it is too early, the mortar joints will not be bonded enough to peel off. If it is too late, it will be difficult to clean because the cement mortar has hardened as mentioned above.
- Use a clean cloth and clean water to clean daily, do not use dirty cloths; and dirty water to avoid losing the color and shine of the tiled floor.
- Do not use chemicals to bleach and clean floor tiles. At the same time, do not use hard materials that rub against the tile surface, which can scratch; and damage the surface of the floor tiles, as well as have the opportunity to affect the quality of the grout.
Basic technical requirements to ensure when tiling the floor:
- The mortar layer is not diluted, do not use too wet or too dry to ensure convenience during construction
- Do not let the mortar stick to the tile surface for too long after construction. The floor surface must be cleaned thoroughly after tiling
- The pattern on the tiles must be arranged in the right direction and model.
- The mortar joints must be straight and neat.
- After laying the floor tiles, there is no clicking sound in the middle of the tile body, the joints are small and even.
3. Suggestions for beautiful, modern tiling methods.
As you know, choosing beautiful tiling methods depends a lot on the shape; color, and type of floor tiles. In addition to the above factors, choosing how to lay the floor also plays an important role in bringing the overall beauty to the entire floor surface of the project. Some beautiful tiling ideas for your reference include:
- Herringbone floor tiles: The symmetrical folded shape of the fish bone is used in flooring. This type of tiling is often used in bathrooms, living rooms,
- Parallel floor tiles: This type of tiling is typical; and popular in current residential and civil works. The tiles are laid parallel to each other; combined with the direction of laying according to the design pattern on the tiles; to create a certain uniformity for the project.
4. Introducing a reputable design & construction consulting service provider
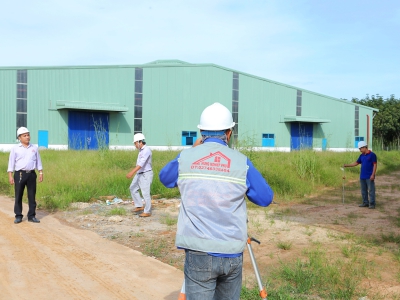
The importance of construction units is undeniable, their reputation will ensure the quality and aesthetics of your project. Currently, there are many units providing design and construction services to meet the increasing construction needs in our country. Therefore, finding a reputable unit is not easy and requires you to spend time researching. In the selection process, you need to research carefully and ensure that the accompanying unit must have high expertise, many years of experience, have a clearly signed contract, transparent costs, ... To help customers save time searching, Hung Nghiep Phu Construction Investment Company Limited is confident that it will be the best choice for you.

Hung Nghiep Phu Construction Investment Co., Ltd. with the mission of providing the best solutions and services, building a prosperous community with customers, Hung Nghiep Phu is gradually affirming its brand through sincere cooperation, with a leadership team with ethical capacity, creativity, high expertise and strategic vision. Hung Nghiep Phu owns a team of skilled, highly qualified employees who will bring customers the best quality technology.
Hung Nghiep Phu Construction Investment Co., Ltd. - specializes in constructing civil and industrial works. We look forward to accompanying customers in construction projects as well as continuous procedures such as planning diagrams, applying for construction permits, completing procedures, applying for fire prevention and fighting certificates,... If you have any questions or are in need of design, completing procedures, please contact us immediately for free consultation!
>>> See more:
_____________________
CONTACT INFO:
![]() Facebook: Công ty TNHH Đầu tư Xây dựng Hưng Nghiệp Phú (興業富)
Facebook: Công ty TNHH Đầu tư Xây dựng Hưng Nghiệp Phú (興業富)
![]() Hotline: 1800.3368 (Miễn phí)
Hotline: 1800.3368 (Miễn phí)
![]() Trang web: xaydunghunnghiepphu.com
Trang web: xaydunghunnghiepphu.com
![]() Gmail: kinhdoanh01@xaydunghungnghiepphu.com
Gmail: kinhdoanh01@xaydunghungnghiepphu.com
![]() Address: No. 2034D, Group 22, Phuoc Thai Quarter, Thai Hoa Ward, Tan Uyen City, Binh Duong Province
Address: No. 2034D, Group 22, Phuoc Thai Quarter, Thai Hoa Ward, Tan Uyen City, Binh Duong Province
------
Source: Compiled from the Internet